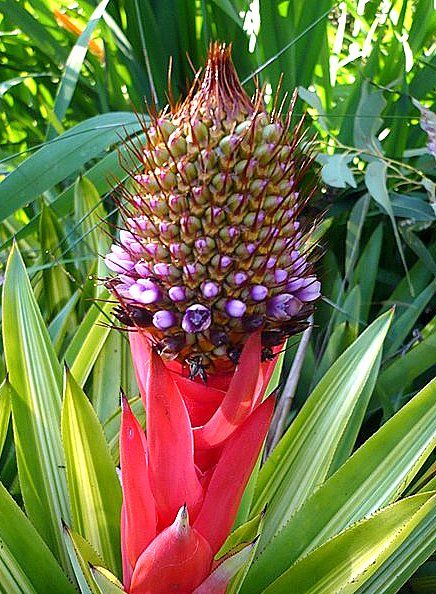
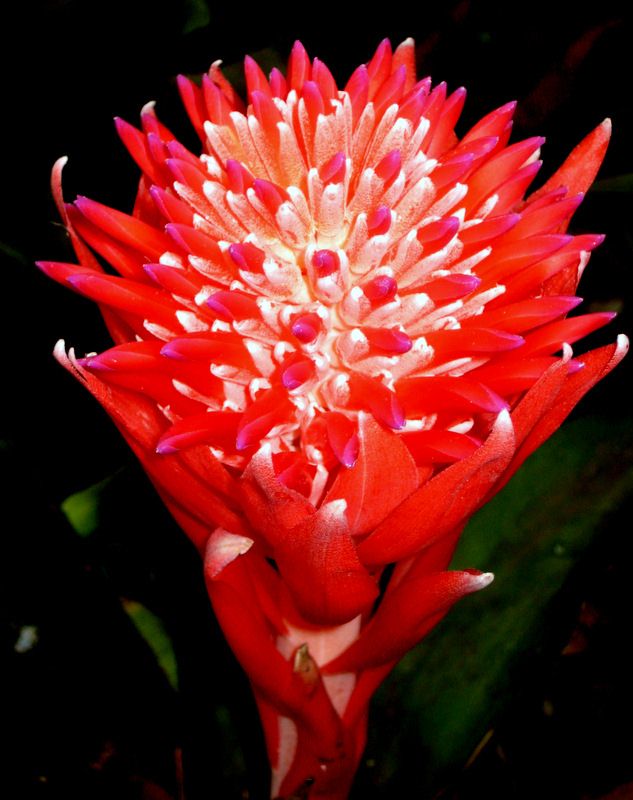
SUN-TOLERANT BROMELIADS
 . . .
. . .
July 2013
SUN-TOLERANT BROMELIADS
. . .
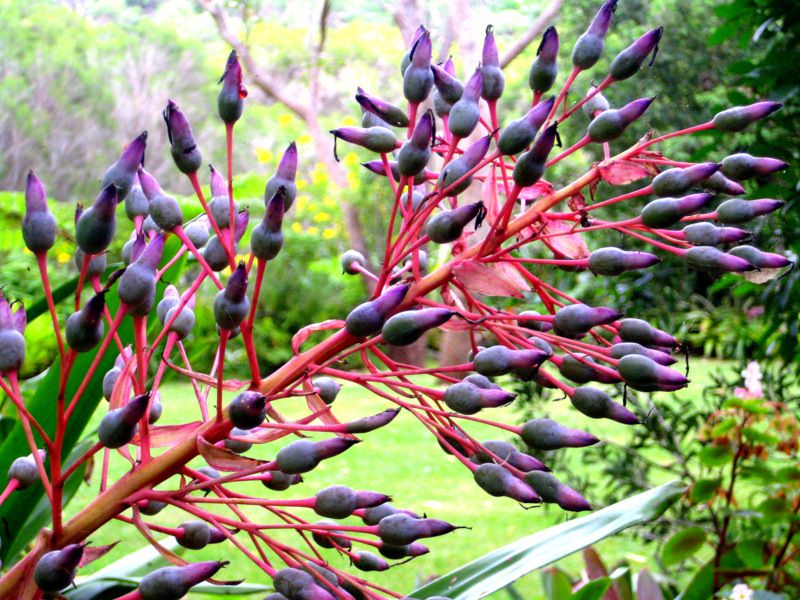
BROMELIADS FOR SHADED GARDENS
 . . .
. . .
NEWS IN BRIEF . . .
NEW MEMBER:
A very warm welcome to new member, Eddy Klavins, who joined our Society at our June meeting.
MONTHLY RAFFLE PRIZE ROSTER:
| Heather Thain, Laurie Irvine, Russell Dixon, Sharyn Baraldi, Max Williams | |
| Neville Wood, Fred Mirande, Suzanne Burrows, John Carthew, Monica De Clouett, Gloria Purdon | |
| Maria Jakobsen, Bruce Cluff, June Smith, Doreen Netting, Jan Stammers | |
| Steve Morgan, Meri Stefanidakis, John Toolan, Beth Clague, Christa Thomas |
MEMBERSHIP FEES:
A reminder that these fees are due and payable by June 30th of each year. Remember that you must be a financial member to be eligible to vote, to be elected to the committee, to enter plants into competition, and to receive our quarterly newsletter, etc.
THANK YOU JŘRGEN JAKOBSEN:
On behalf of the Society I would like to thank Jřrgen for running off the colour covers of this issue of Newslink at his own expense. Many thanks, Jřrgen, from all of us!
UPCOMING EVENTS :
| COLLECTORS’ PLANT FAIR – HAWKESBURY RACE CLUB, CLARENDON 2013 NATIONAL ORCHID EXTRAVAGANZA – Dural Recreation Centre at Ellerman Park, 25a Kenthurst Road ROUND CORNER, DURAL (Entrance off Pellitt Lane) 9 am – 5 pm Friday/Saturday, to 4 pm Sunday; www.ccansw.com.au or 9773 9197 | |
| PORT MACQUARIE ORCHID AND BROMELIAD SOCIETY – SPRING SHOW. PORT MACQUARIE PANTHERS | |
| ILLAWARRA BROMELIAD SOCIETY – SPRING SHOW – UNITING CHURCH HALL, Russell Street, CORRIMAL - 9am - 3.30pm | |
| BROMELIAD FAIR – Concord Senior Citizens Centre, 9-11 Wellbank Street, CONCORD – See details p. 4 | |
| BROMELIAD SOCIETY OF AUSTRALIA – SPRING SHOW – BURWOOD RSL Sat.10-5 & Sun.10-3 | |
| BERRY GARDENS FESTIVAL - $20 for 8 gardens/$5 individual gardens; Tickets at gardens and Apex Park. www.berrygardens.org.au Mary Seelis (02) 4464 1191 | |
| BROMSMATTA CONFERENCE at Novotel PARRAMATTA. Hosted by The Bromeliad Society of Australia. Early Bird Registration before April 30, 2014 $260 pp. www.bromeliad.org.au |
• PETER AND SANDRA MARTIN:
746 Dogtrap Road, SOMERSBY (About 10 minutes from Gosford and just north of Kariong.) Phone: (02) 4372 1339
• BUDERIM BROMS: Lindsay and Danny – Collectors, Landscapers, extraordinaire! 04 0712 0954
They travel the World to collect plants to display in their magical ľ acre garden, ”Belle Rive”, which is divided into rooms, with fascinating art works. Danny and Lindsay have worked in botanical gardens around the World, including the Royal Botanic Garden in Sydney where they designed and supplied the new bromeliad exhibit, and were instrumental in setting up the Open Garden Scheme in Queensland. Their garden is featured on Facebook and other websites. Plants for sale.


*Air New Zealand now has direct flights from Sydney to Rotorua twice a week.
NOVICE
1st = Stephen and Laila Astill = Guzmania sanguinea
2nd = Yvonne Perinotti = Aechmea bromeliifolia var. albobracteata
3rd = Bob Stephens = Neoregelia ‘Predator’
TILLANDSIA
1st = Ann Kennon = Tillandsia cyanea ‘Paradise’
2nd = Maureen Wheeler = Tillandsia ionantha X
3rd = Graham Bevan = Tillandsia somnians
PLANT RESULTS - May 4
OPEN
1st = Steve Morgan = Vriesea hybrid (Nova type)
2nd = Steve Morgan = Catopsis
3rd = Suzanne Burrows = Vriesea ‘Jeanie’
NOVICE
1st = Gloria Purdon = Aechmea ‘Shining Light’
2nd = Lydia and Ian Chinnock = Ananas comosus
3rd = Lydia and Ian Chinnock = Billbergia ‘Ralph Graham French’
3rd = Yvonne Perinotti = Neoregelia Fosperior ‘Perfection’
TILLANDSIA
1st = Nina Rehak = Tillandsia tectorum
2nd = Steve Morgan = Tillandsia rothii
3rd = Steve Morgan = Tillandsia stricta
PLANT RESULTS - June 1
OPEN
1st = Neville Wood = Billbergia hybrid
2nd = Jřrgen Jakobsen = Aechmea conifera
3rd = John Carthew = Neoregelia ‘Predator’
NOVICE
1st = Yvonne Perinotti = Billbergia vittata
2nd = Barbara Jones = Vriesea
3rd = Yvonne Perinotti = Neoregelia ‘Rosea Striata’
TILLANDSIA
1st = Ann Kennon = Tillandsia lindenii
2nd = Ann Kennon = Tillandsia punctulata
3rd = Ann Kennon = Tillandsia araujei
BROMELIADS FOR SHADY AREAS
Reprinted, with permission, from Bromeliads Online www.bromeliads.co.nz/info-shade.html
Denizens Of The Jungle: Bromeliads For Shady Gardens
Most gardens, particularly in older sections of a city, are quite shady. As the gardens mature, shade levels increase, even where plantings have been well planned. Many gardeners will look on these shady gardens and wish for more light. With light comes colour, as many of the more brightly coloured perennials need lots of sunlight to bring out their best. Often, this is the stage when the heavy artillery is brought in: chainsaws, mulchers, trucks and trailers are used to chop, chip and cart the extra vegetation away. But there is an alternative. Instead of bringing in the chainsaw to let the light in, use plants that are adapted to dense shade conditions. Some of the best of these are bromeliads.
These denizens of the jungle are very well adapted to shade, down to the darkest depths of dense forest. Indeed, most of the shade loving bromeliads will either scorch or lose leaf colour with direct sun. Any of the shade loving bromeliads are also surprisingly hardy with many of the types mentioned in this article capable of withstanding several degrees of frost. Some of the shade loving bromeliads are very easily recognised; these are the glossy leafed plants that are burgundy or bronze coloured on the underside of their leaves. This is a special adaptation to the low light levels which are found at the lower levels of a dense forest. The trick that these plants have developed is to let the light penetrate the leaf through the upper surface, then bounce back some of this light within the leaf by the specially adapted, coloured cells on the lower surface. Aechmea ‘Big Stuff’, Ae. ‘Royal Wine’ and Nidularium innocentii are all very good examples of this type of plant. Some of the best ways to show off these plants is on top of a retaining wall, where they can cascade from the top and where the deep burgundy can be seen best. Aechmea ‘Royal Wine’ is very good for this as the orange and blue berries hang over the side. There are some shade loving bromeliad varieties that have burgundy colouring on both sides of the leaf. These can be very dramatic, especially the dark, almost black types like Aechmea ‘Black Jack’, Canistropsis billbergioides ‘Plum’, and Nidularium innocentii ‘Nana’. These dark rosettes make a great contrast to light green foliage such as maidenhair fern.
Green leafed shade loving bromeliad species often have very spectacular flowers. This is to attract birds and insects in the dark jungle depths. Gardeners can make good use of this attribute by planting these glorious flowering plants under dense foliage. The Aechmea genus has many of these types, such as Aechmea gamosepala and Ae. weilbachii, which provide dramatic spires of blue and deep pink for many weeks. The flowers are often followed by very colourful seed heads, which last for several more months. Although the seed heads develop, it is rare for these to be fertile. For viewing from above, such as along a mossy path amongst the ferns, it is hard to beat Canistropsis billbergioides, which comes in several colours, such as ‘Citron’(ed. now called ‘Lemon’), ‘Persimmon’ and ‘Tutti Frutti’. The brightly coloured flowers resemble stars and are held quite close to the foliage. The main flowering season is autumn and early winter, although the flowers last so long that good colour can still be visible in spring. The apple green foliage comes in a tidy rosette and these plants are very prolific, producing up to 3 pups per year. Although many people think of the Neoregelia genus as being best suited to sunny gardens, in fact many of the most spectacular do quite well in dense shade.
For foliage interest, use variegated types such as Neoregelia ‘Maggie’s Pride’ and N. carolinae var. tricolor. The stripes of green, pink and cream are simply delicious. Neoregelia carolinae, N. carolinae ‘Marechalii’, and N. carolinae princeps now N. ‘Princess Caroline’ are some of the best bromeliads. In deep shade the foliage stays dark glossy green, but at flowering the centre leaves change colour, looking like they have been sprayed with lacquer. There is a huge range of colours available, from light pink through red, crimson, orange, lavender, amethyst and purple. Try these in mass plantings on shaded sloping banks, where the mass of colours will take visitors’ breaths away. The Nidulariums, like the Canistropsis, are very well suited to deep shade. The brightly coloured star-shaped flower bracts are held close to the foliage, giving a similar appearance to Neoregelia. Some, such as Nidularium ‘Madame Robert Morobe’, can grow quite large, with a span approaching 1 metre. Nidularium ‘Something Special’ is a very good hybrid bred by a New Zealander, and is similar to Nidularium rutilans, with its dark red flower bracts and lightly mottled green foliage. There are also a few variegated nidulariums, such as N. innocentii var. lineatum, which provide a chance to lighten the dark areas with their liberal stripes of white. Use bromeliads, these denizens of the jungle, wherever bright colours and dramatic foliage are needed. Beside trickling streams, along mossy paths, surrounding quiet pools and under subtropical foliage, these plants are adapted for the conditions.
BROMELIADS FOR FULL SUN AREAS
Extracted from Bromeliads Online http:www.bromeliads.co.nz/sunny.html
While this information was prepared for conditions in New Zealand, I think that we will find here, in this Illawarra region, that most of the bromeliads listed will also do well here—Ed.
Each bromeliad will have more than one preferred growing situation, as most bromeliads are very adaptable. The symbols explain where they are best suited in the garden, which is not necessarily the situation they are found in in the wild. Where the variety is quite happy in more than one situation, this is noted. Where not ‘marked with an ‘x’’, the variety is not likely to prefer these situations.
A WINTER COVER-UP
By Ann Boon
(Reprinted from Bromeliad Society of New South Wales’ Bromeliad Newsletter, July 1991, Vol. 9(7))
As soon as the nights start to get cooler it is time to make sure your plants are comfortably “bedded down” for the winter.
Firstly, clean any foreign matter out of the cups. I use a small paint brush which I find ideal, but buy a new one and use it for no other purpose. Gently turn the brush around in the cup. If you spread the fingers of both hands out and over the top of the pot, you will find that you will be able to form a “web” over the soil and at the same time get a grasp of the pot and use the tips of the fingers to support the plant at the base. In this way, when tipping the pot on its side to empty the water out of the cup, the soil loss is cut down to a minimum and the plant is not disturbed.
Cut away any dead or yellowing leaves by cutting the leaf down the centre from tip to base. Now hold the plant firmly in one hand and gently tear the leaf, one half at a time, away from the plant, working from the cut at the centre to the outside. If you have to trim any leaves always re-shape the tips the same as the leaf grows. If the plants have been outside during the summer months, clean out any dead leaves or grass which may have lodged in amongst the leaves. Pull out any weeds growing in the pots. This does not include those lovely little ferns that decide to come and “board with the broms” from time to time.
If any plants need propping up they can be tied to a small stake, but sometimes I find it difficult to tie it firmly without altering the contour of the leaves. Lucky stones can be used but there is the danger of an offset being damaged should it come up underneath before the stone is removed. A wire support can also be made from a coat hanger.
No hard and fast rules can be set down for watering during the cold weather but it is important to remember that more plants are lost due to OVERWATERING. The needs of plants vary very considerably, to the size and type of pot (plants in terracotta need more watering than those in plastic), the soil, whether it holds the water or is porous, the environment in which the plant is growing and the special needs of the plant itself (does it grow in habitats where it is wet or dry, rainfall, etc,?). If in doubt keep the soil only SLIGHTLY moist and the leaves dry during extreme cold spells. Use a paddle pop stick to test the soil.
If possible, turn the bulbous tillandsias planted on bark in an upside-down position so that the plant will not become waterlogged during any wet weather Water other tillandsias VERY, VERY sparingly. Water the SOIL ONLY of cryptanthus, keeping the leaves dry. The hardier bromeliads may be given a very light spray from the hose to freshen the foliage but pick a warm day and do it early so that they have dried off before the night air begins to settle.
If, through lack of space, some plants have to be left out in the open, try to arrange them in the most protected spot but not pushed into a damp corner which gets no sun. Make a portable fence with wire netting and a few stakes threaded through at regular intervals. This can be put around the plants and fastened together with a tie. Make a tent using hessian or an old sheet (NOT PLASTIC) and tie to the wire. This makes a good cover especially if frosts are expected.
This program may be too time-consuming for members with extensive collections but I have written it as a guide for new members with small collections.
It is a good idea to keep notes on the things you do during the year, so that you can compare and possibly change or improve your program. Don’t rely on your memory. Just when you need it most it has a nasty habit of letting you down!
CULTIVATION OF VRIESEAS
By Olive Trevor
(Reprinted from Proceedings of Bromeliads III Conference, 1985, Brisbane, Queensland)
Vriesea hieroglyphica is known as the ‘King of Bromeliads’, a fitting name for such a majestic plant. Vrieseas have been favourites for decades, true aristocrats of great beauty with their flaming red swords. Their brilliance lasts not for just a few days, but for months. Because they are aristocrats does not mean that they are difficult to grow, or need pampering. In fact, I have found that this is not so.
Vrieseas are the most hardy and rewarding members of the bromeliad family if you give them the correct start. People could have trouble because of over-pampering and over-protecting. In my experience with vriesea growing I have found three basic things that they need for strong healthy growth, abundance of offsets, and larger flower spikes. They are: good drainage, good food, and good light.
Good Drainage
Because vrieseas are mainly epiphytes, they require a very open mixture, one that drains freely and dries out quickly. Avoid any ingredient that rots quickly as this can affect drainage of the root system. Good drainage can be achieved by using a combination of chunky materials.
Some ingredients for potting mixtures: pine bark, peanut or other nut shell, sunflower seed husk, rice hulls, tree fern fibre, coarse sand, gravel, charcoal, coarse ash, perlite, and vermiculite.
It is important that some peat moss be combined with these other materials, as it will provide the acidity that these epiphytes require. Rotting leaves or compost will also achieve the same effect; however these materials break down quickly and could affect the drainage of the mixture: peat moss, compost, leaf mould, and animal manures.
My favourite potting mix is 1 part pine bark, 1 part peanut shell, 2 parts peat moss, 1 part polystyrene granules. Special mix for seedlings: 1 part pine bark, I part peanut shell, 2 parts peat moss, 1 part vermiculite. Mixtures should be made up and used when fresh. If stored, avoid weathering as mixtures start to break down if exposed to sun and rain.
Good Food
Slow-release fertilizers may be added to the mixture or spread on top when potting. Make sure that the granules do not touch the plant or lodge between the leaves. This is especially so with seedlings. Liquid fertilizers are very important, and should be used at half strength. Seedlings should be fed on a regular basis. Green-leaved vrieseas, grown for their colourful inflorescence, depend on fertilizer for the size and colour of their flower spikes. In an experiment I did with two offsets of similar size from a well-grown plant, one was given fertilizer on a regular basis, the other none. The one given the fertilizer produced a magnificent flower spike with many branches, the other produced a simple inflorescence.
Foliage vrieseas (those with the beautifully marked leaves), should be fertilized regularly or growth will be slow. These plants also require more light, and most will do well under 50% shadecloth.
If you follow these rules—good drainage, good food, and good light—you will grow beautiful healthy plants with an abundance of offsets and larger flower spikes.
Good Light
I used to grow my vrieseas under fairly shaded conditions, and here I must give a word of warning. Shaded conditions with plenty of warmth and humidity often result in poor air circulation. Vrieseas need good air circulation, therefore balance must be reached. At this stage, I'd like to mention that some growers lose plants during the cold. Is this due to a drop in temperature, or to over-crowded conditions in an area with poor air circulation?
Let me now refer to the December, 1984 issue of the B.S.I. Journal. In his article, "Brazilian Vrieseas Prove to be Freeze Stalwarts", Ervin J. Wurthmann states, "While appearing to be delicate, many Brazilian vrieseas showed that they can tolerate sudden drops in temperature far below the expected range ... some vrieseas put through the extreme stress of cold survived with a surprising defiance of their situation." Wurthmann then lists those plants that survived, and later into the article lists those plants that didn't survive. One must keep in mind that the temperatures were 20°F, or -5°C, which is extremely cold.
About two years ago, we built a large bush house west of where we now live. Temperatures there drop to zero on quite a few occasions, while 40C-90C is quite common during the winter months. The bush house is a large construction of pipe and shadecloth. The walls are shadecloth; no fiberglass or other materials are used to keep out the cold. In the bush house, we grow a wide variety of foliage plants. Two years ago, I moved quite a lot of my vrieseas out to this area. Most of these are grown under the 70% shadecloth. I have also experimented with vrieseas under 50% shadecloth. All grew well, and coloured beautifully during the winter and spring, until summer when heat wave conditions sent temperatures soaring to 400C.
Vrieseas grown under 50% shadecloth:
Plants that grew well: V. schwackeana, V. platynema var. rosea, V. fosteriana, V. fenestralis, V. fosteriana hybrid, V. hieroglyphica, V. gigantea, V. saundersii, V. gigantea ‘Nova’, V. philippo-coburgii, V. regina, V. imperialis, V. regina ‘Alba’
Plants with some leaf burn: V. hieroglyphica, V. fenestralis, V. splendens, V. guttata, V. platynema var. variegata, Most green-leaved varieties
Plants that did not survive: V. gigantea
This experiment proved to me that most of the banded-leaf varieties grow extremely well under 50% shadecloth with perhaps an extra layer of shadecloth during extreme heat conditions.
Propagation
Propagation can be by offset or seed. Offsets should never be taken off too small. This is one of the most important things about growing vrieseas. Small offsets take a long time to root and become established. Never cut offsets: a large offset will come away from the mother plant easily, but a baby never wants to leave its mother. Offsets should be rooted in small pots before being given a larger pot to grow in.
Growing from seed can be fun, but it takes a long time. In 1979 I planted seeds from a plant with a beautiful branched flower spike, believed to be a hybrid. In 1984, approximately 20 of these flowered: some had lovely branched inflorescences; others had simple spikes.
I do not recommend that plants be grown on black plastic as this material attracts the heat. If no benches are available, a weed mat should be used on the floor and plenty of space left for air circulation between the plants. Mesh benches are ideal as they allow maximum air circulation.
Good light and plenty of air circulation, combined with the previous ingredients of good drainage and good food, should produce excellent plants.
SOME WISDOM FROM SOME OLD JOURNALS
Billbergia pyramidalis: It is well known that Billbergia pyramidalis is a good tree climber; its long stolons grope around the trunk and branches, ever crawling, winding, and getting higher and higher. Even when potted, it still preserves its stolon and climbing habit, but it is not well known that when planted in the ground this true habit disappears and is lost. No stolons are sent out, but instead a tight clustering habit develops and flowering appears to be more prolific. - Temple, Peter (1991) {Extracted from} A Note of Billbergia pyramidalis, JBS January-February 1991 Vol. 41(1)
Avoiding Cold Weather Damage: If you do not have heat in your bromeliad house, you may have noticed that after frosts the condensation causes quite a lot of drip onto your plants. I feel it is these very cold drops of water that cause winter damage on some bromeliads, and we do know that drops from rafters made of treated timber can cause terrific damage amongst some bromeliads as well. Noticeably it is Neoregelia carolinae and varieties that seem to be badly affected by the former. - Hanson, Mrs F. B. (1970) {Extracted from} Some Notes from New Zealand, JBS January-February 1970 Vol. XX(1)
If we are going to have a frost I usually put newspapers over the plants. Since doing this I have found that there has been much less damage on the plants. In the late morning I take off the papers, and it is surprising how wet some are, and always in the same part of the house, too. It doesn’t take long and it is well worth the bother, so I pass this hint on to anyone who may be interested.
Grapefruit Knife for Removing Offsets: {A grapefruit knife} is ideal for removing offsets, as the slight curve on the knife helps it to get closer to the main stem. The serrations are good for cutting through tough offsets—better than any regular knife. - Hanson, Mrs F. B. (1970) {Extracted from} Some Notes from New Zealand, JBS January-February 1970 Vol. XX(1)
Light and Tillandsia cyanea: Humidity has been mentioned as a significant factor in the development of the pink coloration of the inflorescence of Tillandsia cyanea, but light seems to be the primary one. In greenhouse culture in both instances, where humidity is certainly high, last year mine were well colored while for a nearby friend the ‘paddles’ were colorless in his more shaded location. This year the shrubbery around the greenhouse here is higher and shades it more, and the inflorescences on Tillandsia cyanea and X ‘Emilie’ are very pale; One of the latter, however, colored up in a few days when placed outside. - Taylor, Roger K. (1970) JBS May-June, 1970 Vol. XX(3)
When Autumn Leaves Begin to Fall: To those of us who have many bromeliads growing outside under trees, fall is a time when leaves gather in dense masses over and in the tanks of the leaves. In most cases these rot down in the water and do a great deal of good supplying humus in a way that is not possible in a glasshouse. With air movement and rain many leaves gradually work down in a tightly packed mass and gradually break down. - Charley, W. B. (1971) JBS January-February, 1971 Vol. XXI(1)
Could there be any type of tree that has leaves that could be toxic to other plants? Most certainly there are, and with enough accumulation of these in the tanks things will start to happen, notably the appearance of yellow and brown spots in the blades, which eventually will set the plant back and certainly spoil its appearance.
In what part of the world are there trees with leaves that are toxic? I do not know, but here in Australia we have three that will cause the above troubles as we can prove by experience. Most eucalypts, common name is gum tree, are toxic, some worse than others. From these is distilled a very powerful oil used as a germicide. Sassafras has a powerful and toxic oil known as safrol which is used to kill wogs {sic}. The ti-tree, which produces Titrol, is used in many ways as a germicide and in soap. Certainly these are all essential oils, but the fact remains that if soaked in water long enough they do give off poisons that are little known. Stagnant water in a pool in the bush under gum trees is slightly blue in color and has a slight taste. Bushmen drink it as a matter of course with no bad results, but city folk who go into the bush treat such water with great suspicion. Gaze into a pool dense with sassafras leaves rotting at the bottom, and in bright sunlight the water at the level immediately above the leaf mass has the appearance of syrup, and in this lies the toxic matter.—Bilpin, Australia.
Getting Pups to Root Quickly and Vigorously: {Alec Campbell} spoke to the meeting on the success he has had in the rooting of offsets by initially placing them in a polystyrene box containing a layer of cow manure and then a layer of good potting mix. Plants are inserted in the potting mix very close together. This has a steadying effect on the unrooted pup. Keep the mix moist but not saturated. The effect of shelter and warmth from both the cow manure base and the styrene box seems to assist the formation of an extremely vigorous root system within a short space of time. After a few weeks Alec then pots individual plants as normal. - Williams, A. (1991) Notes from a Workshop 13th August 1991. Bromeliad Newsletter, September 1991 Vol. 9(9)
Another Way to Root Bromeliads: The use of perlite (sponge rock) as a medium to root bromeliad pups is not new, but this information has in all probability not been available to everyone. - Wurthmann, E.J. (1992) (Reprinted from Bromeliad Society of NSW Inc.’s Bromeliad Newsletter, March 1992 Vol. 10(3), in turn reprinted from J. BSI USA)
The writer finds it a very satisfactory medium for rooting The advantages are numerous; foremost, in ease of handling. After allowing a day or two for the severed area to callus, simply plunge the offset into a pot filled nearly to the rim with wet perlite. When the plant will remain upright, stop plunging. Planting can be multiple (four to six pups) per six-inch pot. Water the pups in.
They can be sprayed immediately with a soluble fertilizer at a concentration of one teaspoon of fertilizer per gallon of water. Spray this solution on the pups weekly. Never allow the liquid in the plant cup to dry completely because the higher concentration of the fertilizer could cause leaf burn.
Misting the pups with water will be a matter determined by the available humidity every day in the greenhouse for example. I doubt that you can over-water in perlite.
Light requirements are the same as for a growing plant of the same species.
The time needed to root the plants is the product of the species involved and the weather conditions. After about four weeks pull a plant to see how it is doing. If no roots, plunge it back and check at weekly intervals. As soon as the roots have started pot the pups after shaking off any perlite that sticks to the plant.
Footnote: Ann Boon from Bromeliad Society of New South Wales. I have used perlite for rooting offsets and have found it a reliable medium. However, should the pots be in other than a regulated environment (e.g., an enclosed glasshouse and watering system), wind and an accidental harsh spray can cause the surface perlite to end up on the floor. This can be avoided by using a fine layer of coconut fibre to cover the top layer of perlite. When the offsets have all been repotted the coconut fibre and the perlite can be washed, dried and stored for future use. When using perlite it must be remembered not to let it dry out and special care must be taken during the very hot weather.
If you have a large number of offsets to ‘strike’ the use of Styrofoam boxes will make the job a lot less time-consuming.
Difficult-to-root bromeliads such as Vriesea fosteriana ‘Red Chestnut’ have responded well in this medium. When potting up this plant, formulate an airy mix that will accept frequent watering.
Bromeliads can be grown in an all-perlite mix but must have frequent foliar feeding because the perlite provides no nutrition. Perlite for rooting plants can be considered an almost fail-safe medium.
Bromeliads Need Hanging: Not that they have committed a hideous crime or even stolen a horse. They need air movement around and through them. Those such as billbergias, aechmeas and other tank types don’t need as much air movement, but the epiphytic and xerophytic types need air movement to move moisture and dissolve nutrients for the trichomes to catch and funnel into the interior of the leaf for subsistence. If the plant falls to the ground and is not picked up, it will slowly die from the lack of air movement. - Oleson, S. (1991) Bromeliad Newsletter (Bromeliad Society NSW) July 1991 (Vol. 9(7) in turn reprinted courtesy of the Greater New Orleans Bromeliad Society.
Hanging saves much bench space and is the best way to view the beauty as the bloom can be at eye level or above. In general this type of display can increase the aesthetic appearance of the plants—more jungle-like. Hanging can be a treatment for many ailing bromeliads without any other change in culture A substantial improvement should be apparent. The aeration increase is like giving the plant a shot of tonic and offsets the effects of over-watering and poor drainage.
The plants can be cascaded by hanging one under the other. Cut a separated wire pot hanger approximately in half, recurve the upper end for hanging on the hanger above.
MANY DRY GROWERS PREFER TO BE WET
By George H. Anderson
(Reprinted from the Bromeliad Society of New South Wales Bromeliad Newsletter, July 1991 Vol.9(7)
Many bromeliad hobbyists find it difficult to grow nice specimens of dyckia, hechtia, deuterocohnia, puya and other ‘dry growers’. Their problems begin when they attempt to duplicate the xerophytic conditions they imagine these plants prefer. They commonly put together a coarse, highly porous and permeable mix that is low in organic content. These mixes hold little moisture and as the plants grow the leaves shield the mix and further reduce the water available to the roots. This water starvation causes a dieback of the leaf tips that becomes more and more unsightly.
The solution to all of this is to grow them very wet. Use an absorbent mix and water from the bottom by setting the container in a pan of water. We use the taller geranium style pots since these plants like to put their roots straight down. Put a bit of gravel in the bottom of the pot and use Hyponex All Purpose potting soil. Cut this mix with some coarse perlite and throw in some MagAmp slow release fertilizer. Supermarkets sell a variety of cheap aluminium foil pans in various sizes from tart to pie that are ideal to set the pots in.
It is not necessary always to have water standing in the pots. The primary concern is to make certain that the mix stays quite damp. It is alarming at first to see the pot sitting in a pan of water You will be afraid the plant will rot off in short order. Not to worry, the plant will love it. Later on if you want to enter your plant in a show, just dry it out for a few days and this will enhance the colour.
Footnote: {From Alice Williams of the Bromeliad Society of New South Wales, July 1991}
Having had considerable difficulty in growing the plants mentioned to a good standard and to avoid dieback of the tips, I have been following the advice of George Anderson with great success.
I use the large 200 mm black plastic pots (the ones that everyone seems to collect too many of). This gives ample room for roots and also serves the purpose of giving height off the ground, particularly with Hechtia texensis with its long recurving leaves. Re-use aluminium foil pie containers and make sure the dish is full of water at your regular watering time.
I have found that a good mix is standard indoor potting mix with added coarse river sand or even very fine gravel and perlite plus either slow release fertilizer or Dynamic Lifter. The mix should be rather firm and able to retain considerable moisture but not become sour. These are one group of plants with which I do not use pine bark in the mix.
Although this group of plants grow extremely well in the open garden, I find they need protection from the severe summer sun.
PREPARING BROMELIADS FOR A SHOW OR SALE
By Brenda Wegner, writing in the East London (South Africa) Bromeliad Society Newsletter, September 2012 – reprinted from Bromeliad, J. Bromeliad Society New Zealand, January 2013, Volume 53(1)
At some stage in your gardening or bromeliad collecting career you are going to want to show off your bromeliads or perhaps put them up for sale. Here are a few pointers to make the best of the opportunity.
Culture
The pot should be clean with no salt residue around the base and suitable for the type of plant. It should not be too large or too small. It is usually easier to repot a plant into a new pot than to clean the pot.
This is a good time to select a pot size in proper proportion to the plant. A larger pot makes it easier to centre the plant. Don’t pot the plant too deeply. Ensure that the surface of the potting mix is clean and free from moss, slime, debris or weeds. To clean up the bromeliad, remove trapped leaves and debris by hand or a long pair of tweezers to remove deeply embedded debris. Be careful not to dig around too harshly so you don’t break or tear a leaf. Loosen stubborn dirt at the base of leaves with a soft artist’s brush. Use a hosepipe with a nozzle that will give a good spray without too much pressure to wash out remaining dirt and debris. Wipe clean the surfaces of leaves individually.
Diluted pineapple juice or any citrus juice can be sprayed on leaves to remove salt deposits. Just be sure to rinse the juice off well or it may leave a sticky, shiny film on the plant. You can also try club soda. Some gardeners say it does not leave a film on leaves. Check the lower leaves and remove any tatty or damaged leaves carefully. Unsightly burn or other marks near the ends of the upper leaves may be removed by trimming the leaves. A sharp pair of scissors works well.
When trimming a leaf, shape it to be the same as the leaf above and this is best done a few hours prior to showing the plant so that the leaf cut is fresh and not discoloured. Cutting a leaf too far back could change the natural shape of the leaf and the plant’s conformation. Trimming a plant with a brown/damaged fingernail tip is tricky. You may decide not to trim at all if it will do more harm than good to the look of the plant. Plants must be healthy and not have any pests such as scale or diseases present.
It’s interesting that the inflorescence (flower spike) is not as important when a plant is judged at a show. The conformation of the plant i.e., the shape—must comply with the known and ideal characteristics and qualities of its type and class. Plants may come from different clones and look rather similar, but some clones will be better than others.
Final evaluation before showing or selling
View the plant from all sides and from the top. Straighten the plant if necessary and firm the soil around it. Be sure the mix on top of the soil is neat. Neat appearance counts a lot.
Ask: Does the plant appear healthy and properly grown? Does its foliage have the appropriate sheen? Are the colours rich? Are the markings clear? Is the symmetry appealing and appropriate? Is the size close to maturity? Is the leaf damage inconspicuous?
Don’t be overly critical. Fix what you can, but remember that there are very few, if any, perfect plants.
Transporting plants
Take extra time packing your plants to be sure they don’t damage each other or topple over in transit. Take your tools and extra potting mix with you just in case there’s a mishap along the way.