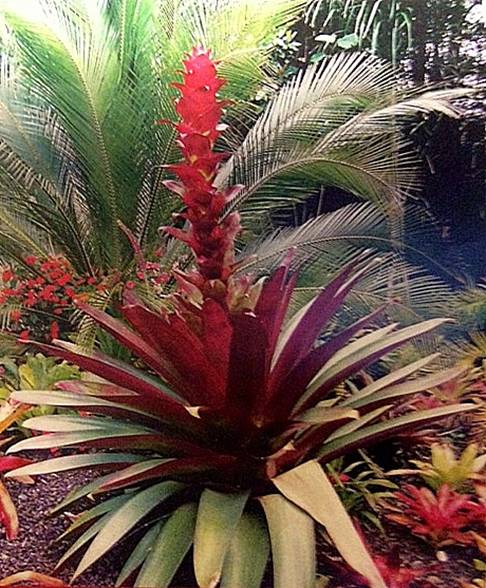
Alcantarea imperialis “rubra”
Photo by Kesson Sharp
Reprinted from Bromeliad, J. BSNZ, June 2007
January 2015
Alcantarea imperialis “rubra”
Photo by Kesson Sharp
Reprinted from Bromeliad, J. BSNZ, June 2007
POINTS SCORE WINNERS:
Hearty congratulations to our Points Score winners for 2014. Jřrgen won with the highest points in both the Open and Tillandsia sections and Max won in the Novice section, just pipping at the post John Toolan who was just one point behind. But thanks go to all of our members who participate in our monthly competitions as I have heard that for many of our members seeing all of these beautiful plants on display is one of the highlights of our meetings for them.
MONTHLY RAFFLE PRIZE ROSTER:
We will again be using the roster system for providing prizes for our monthly raffles and I would like to remind members of the few changes that were implemented last year. Firstly, bromeliads are the preferred option; however, for newer members who may not have a plant to spare, an item to do with the culture of bromeliads is acceptable—for example, gloves, fertiliser, secateurs, labels, hangers, etc. Plants other than bromeliads and lemons, etc. will no longer be part of the raffle, but may be brought along as ‘free offerings’. Secondly, in order to cut down on the time spent on the raffle, a maximum of five bromeliads per rostered member (but one plant is acceptable) is requested. If you are unable to attend the meeting—and/or are unable to supply a raffle prize when rostered—it would be appreciated if you would either ‘work a swap’ or speak to Suzanne about getting a fill-in for your month. These raffles are important to our Society as we rely on them to help defray costs, such as insurance, hire of the hall, etc., and so your support is very necessary and very much appreciated.
| Suzanne Burrows, Les Thain, Colleen Claydon, Fred Mirande | |
| Rhonda Grant, John Toolan, Beth Clague, Meri Stefanidakis | |
| Jřrgen Jakobsen, Loreen Whiddett, Sharyn Baraldi, Maadi McKenna | |
| Terry Stedman, Nina Rehak, Sandra Southwell, Eunice Spark | |
| Pam Townsend, Neville Wood, Lydia Chinnock, Carole Taylor | |
| Max Williams, Jan Stammers, Sandra Carnie, Freda Kennedy | |
| Noel Kennon, Carol Carthew, June Casey, Graham Bevan | |
| Val Miller, Laurie Dorfer, Edwina Caruana, June Smith | |
| Vicki Joannou, Bob Stephens, Beverley Irvine, Yvonne Perinotti | |
| Jim Beverstock, Ted Clare, Monica De Clouett, Rhonda Patterson | |
| Stephen Astill, Glenrae Barker, Eileen Killingley, Doreen Netting |
WORKSHOP:
The first of our workshops for the year is planned for Wednesday, March 18 and is to be held at the Illawarra Light Rail Museum in Albion Park Rail. The usual times apply – 10.00 am to 2.00 pm – and anyone interested is invited to attend. Bring your lunch—barbecue facilities are available—and something for morning tea would be appreciated. [There is a large picnic shelter on the property which has a tap and power point if we need to boil water.] Also, as the Museum is located in a small melaleuca forest, sometimes mosquitoes can be quite bad so insect repellent is advised. This will be a BYO workshop so that if you have plants that might need separating, or needing some work or information on, bring along your pots, potting mix, tools, etc. and Graham, Neville and Max will be available to help with any queries or help that you might need.
To find the venue, when coming from the north, proceed south down the main highway and continue south over the Macquarie Rivulet and through the shopping area of Albion Park Rail. Continue along until you go over a slight rise and at the bottom there are traffic lights, with McDonald’s on the left. Turn right at these lights and into Tongarra Road and proceed along this road for about one kilometre until you come to the entrance of the Museum on your right. It has a white post-and-rail fence at the front and an old light blue steam locomotive inside. From the south, travel north along the main highway until the Oak Flats interchange. Pass beneath the interchange and continue for about two kilometres until you come to a set of traffic lights, with McDonald’s on your right. Turn left here into Tongarra Road and then follow the directions as above.
UPCOMING EVENTS :
| BROMELIADS AUSTRALIA – OPEN DAY – 49 Rutleys Road, WYEE. See back page for further details. | |
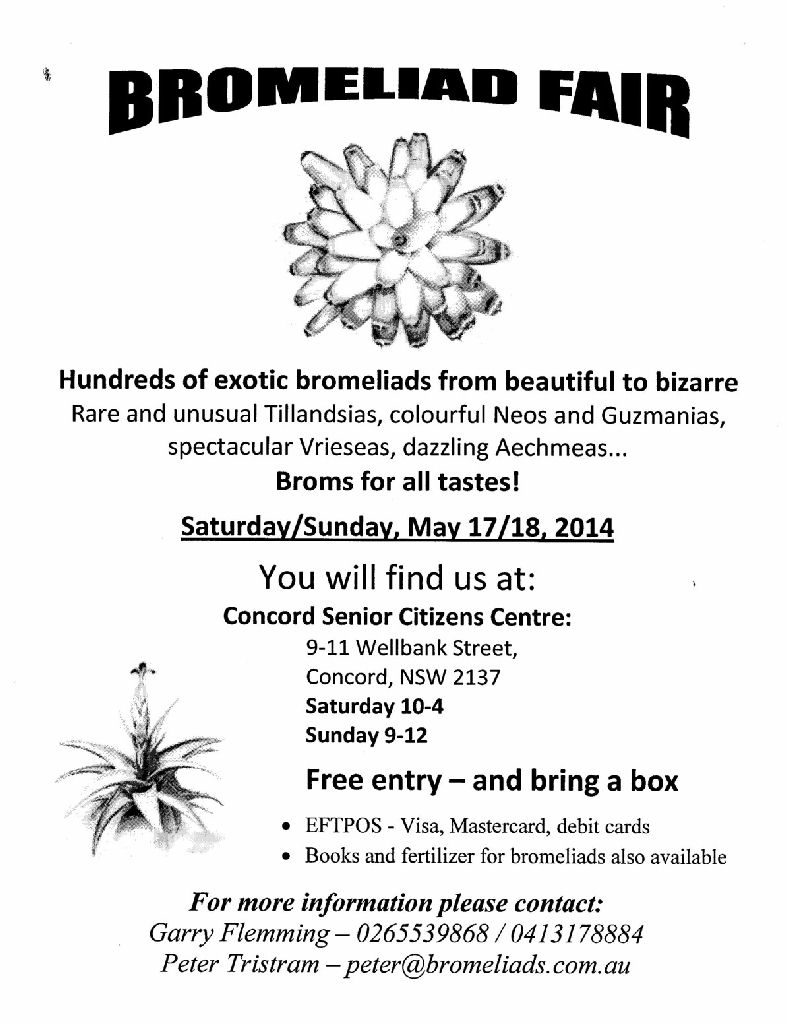
| BROMELIAD FAIR – Senior Citizens Centre, 9-11 Wellbank Street, CONCORD Saturday 10.00 am to 4.00 pm/Sunday 9.00 am to midday. See back page. | |
| COLLECTORS’ PLANT FAIR – HAWKESBURY RACE CLUB, CLARENDON. Saturday 8.00am–4.00pm, Sunday 9.00am–4.00pm. $12 Saturday/$10 pre-booked; $10 Sunday/$8 pre-booked and $12 for weekend if pre-booked. Phone:(02) 4567 2026; www.collectorsplantfair.com | |
| 2015 |
BROMSMATTA – 18TH AUSTRALASIAN BROMELIAD CONFERENCE, NOVOTEL, PARRAMATTA. Hosted by The Bromeliad Society of Australia. Full Registration $300 pp. Friday-$150, Sat$80, Sun$80. Weekend free public sales. Registration Form available on www.bromeliad.org.au |
MONTHLY PLANT COMPETITION RESULTS:
I do apologise for including incorrect details for the October 2014 Plant Results in the Novice and Tillandsia sections in our October/November issue. Below the corrected information. Ed.
October 4, 2014: Plant Results
OPEN
1st = Noel Kennon = Neoregelia ‘Granada’ X pauciflora
2nd = Noel Kennon = Aechmea distichantha var. glaziovii
3rd = Noel Kennon = Cryptanthus ‘Ruby’
3rd = Jřrgen Jakobsen = Quesnelia ‘Farro’ (formerly Q. testudo Variegated)
3rd = Nina Rehak = Aechmea recurvata
NOVICE
1st = Lydia Chinnock = Aechmea recurvata
2nd = Beth Clague = Neoregelia ‘Heatwave’
2nd = Max Williams = Vriesea ‘Forrest’
3rd = Lydia Chinnock = Billbergia hybrid
TILLANDSIA
1st = Graham Bevan = Tillandsia recurvifolia
2nd = Lydia Chinnock = Tillandsia ionantha
3rd = Jřrgen Jakobsen = Tillandsia ionantha var. stricta
November 1, 2014 PLANT RESULTS
OPEN
1st = Noel Kennon = Aechmea triangularis ‘Red Bands’
2nd = Neville Wood = Neoregelia ‘Von Cos’ (unregistered)
3rd = Jřrgen Jakobsen = Guzmania ‘Limones’
NOVICE
1st = Lydia and Ian Chinnock = Nidularium innocentii var. lineatum
2nd = Max Williams = Vriesea ‘Kiwi Sunset’
3rd = Lydia and Ian Chinnock = Aechmea nudicaulis var. aequalis
TILLANDSIA
1st = Jřrgen Jakobsen = Tillandsia foliosa
2nd = Graham Bevan = Tillandsia streptocarpa
2nd = Graham Bevan =Tillandsia seleriana
3rd = Graham Bevan= Tillandsia velickiana
MOUNTING BROMELIADS:
Notes from a talk given by Laurie Dorfer at our November, 2014 meeting.
At our November meeting Laurie gave a fascinating talk/demonstration on mounting bromeliads. He started out by showing us examples of mounted vs. potted plants so that we could decide for ourselves which were nice/nicer!
Some examples:
• Neoregelia ‘Norman Bates’ - Here the mounted plant, growing out in full sun, had lovely colour and shape while the potted plant, receiving a bit more nutrient, had less colour.
• Tillandsia xerographica - potted = nice; but mounted on driftwood = gorgeous!
• Guzmania ‘Repton’ - having started out at the same size, the potted plant now had one inflorescence while the mounted plant had three.
• Tillandsia capitata ‘Peach’ – the mounted plant had a great shape—shorter and wider.
Some notes:
• Don’t use growing medium around roots or between plant and mount as roots will grow into that instead of attaching to the mount.
• If plants are coming out of a pot, cut off most of the roots before mounting as these roots will die when exposed to the air anyway!
• Mounted plants require watering more frequently – Laurie’s are watered thrice weekly.
• His mounted plants also have a consistent feeding program: weekly/fortnightly/monthly.
• Some plants do better as a clump before mounting. Allow them to clump while potted, and then mount. This will maintain water within cups and create a microclimate preferred for growth.
• If hanging mounted plants on a Colorbond fence cover with shade cloth or bamboo screen first to prevent heat buildup.
• Don’t mount on treated pine (can kill tillandsias and other bromeliads).
• Don’t mount on a magnet—not natural!
Placement on Mount:
• For a single plant, place on lower half of mount.
• For multiples, Laurie prefers to work with odd numbers—e.g., 1 – 3 – 5 (3 works well!).
Here he would place two on the lower half—staggered—and the third on the upper half (not equidistant!).
Glue and Ties:
• Ties/glue need to last for at least a couple of years to allow roots to establish.
• Pups are usually relatively large when removed supporting considerable weight, so need strong ties to give them support until roots develop.
• Laurie always uses Selleys Clear sealant as it stays soft, allowing roots to penetrate. It also sticks even when surface is wet, dirty and/or greasy.
• Glue will require overnight to dry—a week in winter!
• Liquid Nails – Can restrict root development.
• Avoid using cable ties as they break down in the sun fairly quickly—within 12-18 months.
Mounting:
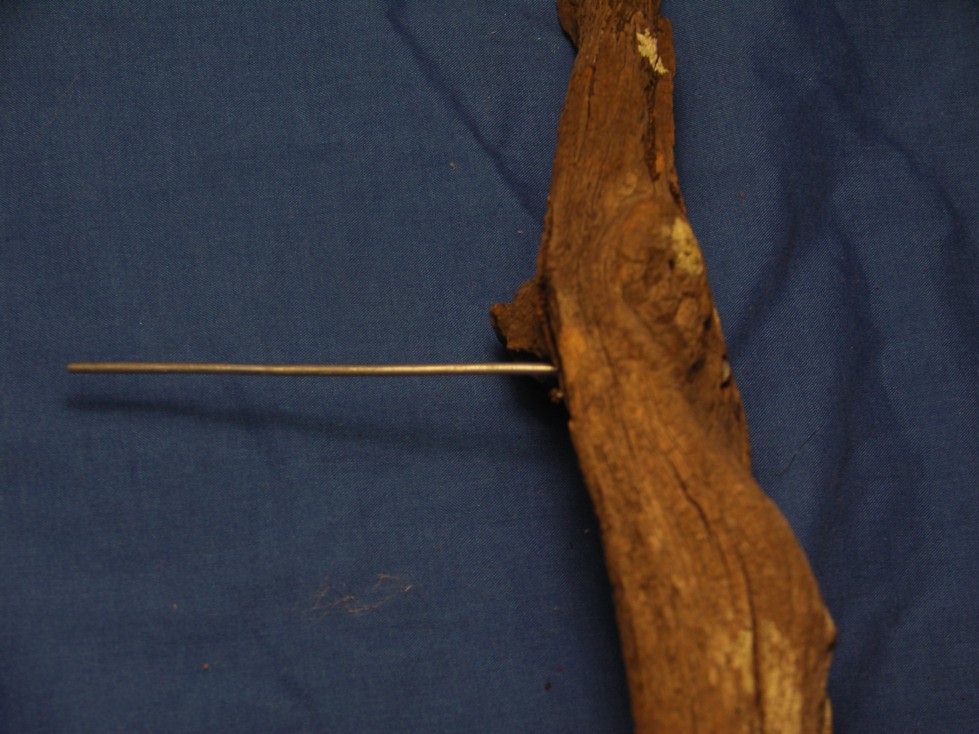
As Laurie likes to mount many of his plants he keeps a collection of driftwood, roots and suitable pieces of wood on the roof of his garage so that any salt can be leached out over time with the rains. When it comes time to mount he gathers up a selection of these—along with the plants he wants to work with—and then chooses a piece which he thinks would best suit a particular plant.
• Next step is to make a hook for hanging the mount. Choose heavy duty wire for hanging a heavy plant—say 2 mm. PVC coated wire is strong and lasts for years.
• To do this cut a length of wire [ ~150 mm or longer], and bend over one end (~10 mm in length) until folded onto itself (to keep it from going through the hole—but will stay pretty much flush--on the front side of the mount). Feed the wire through and then make 3 (three) angled bends to create a hook (see below).
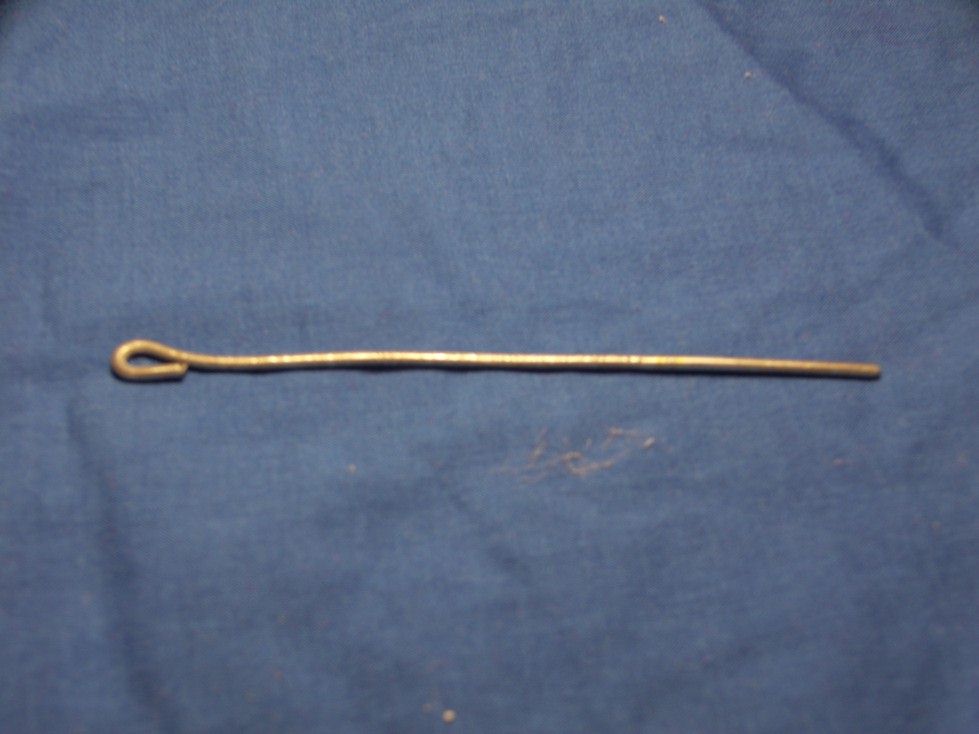
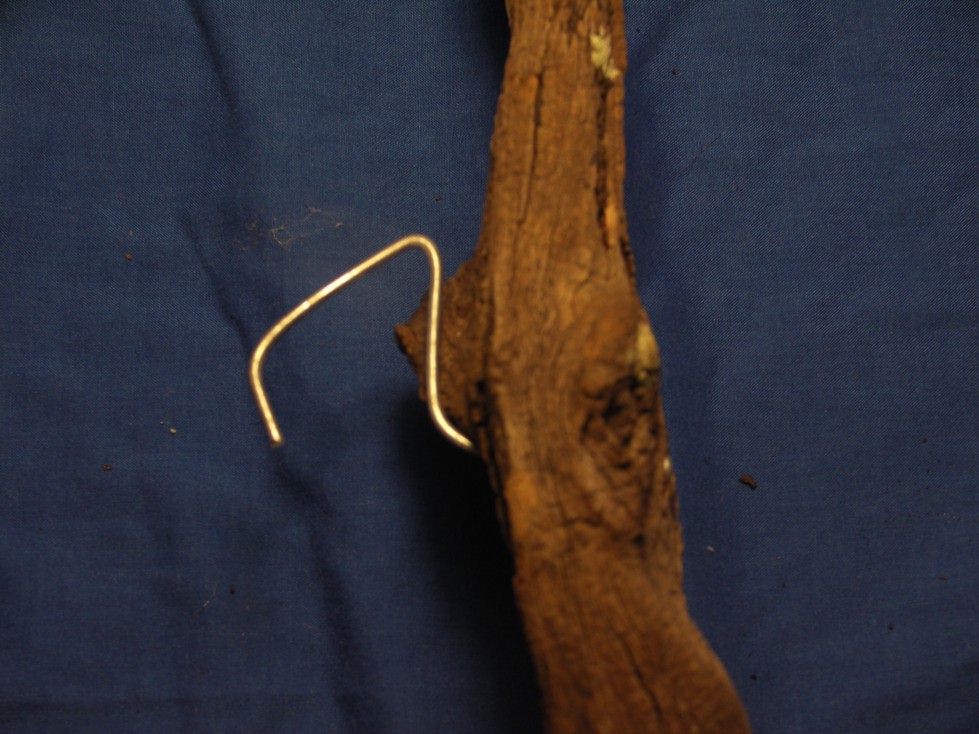
• Drill a hole of suitable size through the wood at the level where you think the hook should go [but always hang from the top section, not the middle]. [Laurie uses a Makita cordless drill for this as he finds it great and other brands didn’t seem to hold the power as well!]
• Laurie uses a range of different weight wires, depending on the size and weight of the plant. These range from PVC coated telephone wire for smaller, lighter plants to 1 mm PVC coated electrical building wire for larger/heavier plants.
• When ready to position the plant, drill two holes through the wood close to the base of the plant for the wire that you will be using to hold the plant to go through to fasten.
• Leave one end of the wire longer than the other for ease of working with.
• Run the wire around the root area and through the holes on either side of the base of the plant and then pull and twist at the back, until there is no lateral movement.
• When working with multiples, work from the top down so as to avoid damage to any lower mountings.
• For single plants, use a small dab of glue—not enough to run—then thread wire around the leaf bases to hide. [A soft telephone wire works well for this!]
• For name tags, a shaped orchid tag, with the narrow base cut off, is used. Write name of plant on first, before attaching it to the mount with stainless steel screws.
VALE: NAT DE LEON:
It was with sadness that I learned of the passing of Nat De Leon who I felt I had somewhat come to know through the articles covering his talks, etc. in the Bromeliad Society of South Florida’s [BSSF] newsletters over the years. He was a noted hybridist, and among some of his better known hybrids are Aechmea ‘David Barry’, xNeophytum ‘Ralph Davis’ and xNeophytum ‘Gary Hendrix’. There’s also Nidularium ‘Nat De Leon’, a very beautiful plant, but never really registered by that name. Nat was a founder and first president of the BSSF and played a major roles in the BSI, the BIC [Bromeliad Identification Center at the Marie Selby Botanical Gardens] and the FCBS [Florida Council of Bromeliad Societies]. He received numerous awards over the years, the most recent being the Wally Berg Award, conferred on him at the WBC in Honolulu last September. He died on January 28 at the age of 87 and will be sadly missed by all who knew him.
BROMELIAD BASICS: REMOVING OFFSETS
By Karen Andreas (email: karen@digital.net)
[Reprinted from Journal of The Bromeliad Society, March-April 2010, Vol. 60(2)]
Bromeliads reproduce by setting seeds and also by growing offsets, also known as pups, often from the base of or from between the leaves of the mother plant. Removing pups generally is easy to do.
The decision on whether or not to remove pups depends on the growth habit of the bromeliad. Neoregelias generally need room to achieve a round, symmetrical appearance, and so those pups should be removed. There are neoregelias, however, that are the exception to this rule. Neoregelias that have “stoloniferous” growth such as ‘Fireball’ can be allowed to grow into clumps. Stolons are woody stems that send the offset out and away from the mother as opposed to the offset growing close to her base. Other bromeliads that have upright, tank-type growth may be allowed to grow in clusters. These include aechmeas, billbergias, guzmanias and some vrieseas. While you can let these grow into clusters, often removing the pups will stimulate the mother plant to produce more. Sooner or later, however, you will need to thin the clump to provide better air circulation and room for the increasing growth as the pups pup.
A general rule of thumb is to remove the offset when it is half to two-thirds the size of the mother plant. If your goal is to produce as many pups as possible, you can remove them at a smaller size, but leaving them until they get a little larger increases their viability. Remove the pup by using sharp clippers and cutting it as close to the base of the mother plant as possible. If the mother bromeliad is in a pot, you may have to remove it from the pot to get a clean cut. If it is in the ground, you may need to dig some of the soil away from the base so you can see what you are doing and make a good cut. Once the pup has been removed from the mother, you can let the cut end harden in the air before replanting. This gives the cut tissue time to toughen up before putting it in soil or mounting it. Dip the cut end in a rooting hormone to promote root growth and also to provide protection against fungus. Pot the newly liberated pup in a medium that drains well. You may need to stake it until it gets established in its new home. This also would be the time to mount a bromeliad. A new pup is likely to attach itself more easily to the mounting material than a mature bromeliad.
Cryptanthus pups are the easiest offsets to remove. Once the cryptanthus pup gets large enough, hold the pup and gently tug. If it is ready to be removed, it will release from the mother plant. If it resists, try again in a few days. Once you separate it from the mother, you may remove the small leaves at the base of the pup, dip the end in Root Tone and plant in a well-draining potting mix.
Although most bromeliads bloom only once in their lives, their pups ensure that they live on in our collections—and provide extras for us to share!
RAPID VEGETATIVE PROPAGATION OF ALCANTAREAS
By Bob Reilly (email: bob.reilly@nrm.qld.gov.au)
[Reprinted from the Journal of The Bromeliad Society, July-August, 2004 Vol. 54(4)]
Alcantarea species are increasingly being used in sub-tropical and tropical areas as feature plants in landscaped gardens. Often, an even more impressive effect can be achieved if they are planted in groups or rows. However, it is not always easy to obtain large numbers of these plants.
These plants can be grown fairly easily from seed, though seed is not always available and can sometimes be incorrectly labelled. Further, it may be desirable to propagate from a particularly striking plant (clone). In these situations, vegetative propagation can be relied upon to produce the plants you desire.
A rapid vegetative propagation technique is available for Alcantareas. This technique, and a modification of it suitable for growers without elaborate growing aids, is described in the balance of this article.
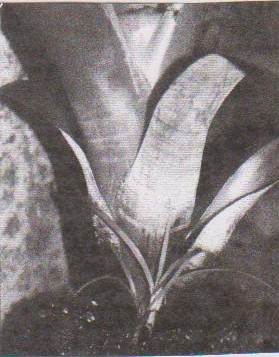
Alcantareas produce small “adventitious” offsets when the plants are immature (Fig.1) and, with much reduced frequency, when they are approaching maturity. The propagation technique relies on harvesting, and rapidly multiplying these offsets.
 . . .
. . . 
• Detach the adventitious offset(s) from the parent plant. This can best be achieved by placing a small knife blade behind the offset and near its base, and then “levering it out”. This step usually requires some practice to achieve consistent success. Inexperience may result in you severing the offset without any basal tissue.
Fig. 2 shows offsets which will produce roots.
• Adventitious offsets as small as one centimeter (cm) high can often be harvested successfully. However, the offsets of some species—for example Alcantarea imperialis—need to be about 4 cm tall before they can be harvested with a high success rate.
• Pot the offsets into 50 mm pots/tubes, using a potting mixture comprised of 1 part Perlite to 1 part peat moss.
• Water the plants at least four times a day.
• Use a liquid fertilizer once a week. The use of a fertilizer in the potting mixture is not recommended because of the risk of the fertilizer lodging in the offset’s central leaves during watering. This event often results in the offset dying.
• When the plants are about 10 cm high, pot them into a 140 mm pot. The basal tissue of the plant needs to be exposed, so as to maximize the production of adventitious offsets. It may be advantageous to use small stakes to help support the plant.
• The potting mixture should include a balanced plant fertilizer such as Osmocote. Continue using liquid fertilizer on a weekly basis.
• When the first group of adventitious offsets are removed from each plant, remove its basal leaves. This action stimulates the production of more offsets.
• Offsets can be removed throughout the year if “bottom heat” can be supplied to them while they are developing roots.
This technique can produce over 50 offsets from the initial offset in less than a year. If you do not have the equipment to provide regular misting and bottom heat, then the technique outlined above requires modifying. The modifications are:
• Offsets are harvested when they are 4 to 7 cm high, rather than 1 cm. Such offsets usually only require watering once a day or every second day.
• Place several of the offsets in a 100 mm pot (known as a “community” pot) rather than separately into 50 mm containers. Better survival and growth rates are achieved this way.
• If the minimum night temperature falls below 10 C cease removing offsets as they will usually produce few, if any, roots below this temperature.
This modified technique usually results in around 10 offsets being produced from the initial offset over a 12-month period.
The techniques outlined above have also been used successfully to rapidly propagate those Vriesea and Werauhia species which produce adventitious offsets.
Acknowledgements:
The first technique described in this article is largely based on a lecture given by Bruce Dunstan at the March 2004 meeting of the Bromeliad Society of Queensland.
ALCANTAREA PROPAGATION BY ADVENTITIOUS PUPS
By Bruce Dunstan
[Reprinted from Bromeliad Society of Victoria newsletter, February-March, 2011 Vol. 28(1)]
I have been interested in the genus Alcantarea for a number of years, having seen them growing in botanical gardens in Hawaii, Florida and Costa Rica and I hadn’t seen many grown in Australia. Over the past five or so years I have found growers who have limited numbers of a range of species.
The fact that it takes so long for Alcantareas to flower means that one of the quickest ways to multiply these plants is to start growing the adventitious pups. The first species I started with was A. imperialis. This plant takes between 12-15 years to produce a flower spike. Needless to say my original plants I bought 9 years ago, I think, it was so long ago, at a combined show at Mt Coot-tha, have still to flower. They would be easily more than 2 metres across and are about 1.5 metres in height. A. imperialis tends to produce a lot of pups when the plants are less than 200 mm tall. I started by removing these pups carefully with a sharp knife. It took quite a while, and also lots of pups were destroyed by not getting any of the basal tissue from which the roots will eventually emerge. As I have done more pups over time, I have found that rather than cutting the pups from the parent plant, it is best to almost lever them away, by placing the knife in very close and then twisting. This prevents the heartbreak when you don’t cut close enough to get any of the basal tissue of the pup.
When I started, I waited until the pups were a reasonable size before harvesting. As I did more and more I realized that they could be taken at much smaller sizes. The average size I generally take them at now is about 50 mm tall. The harvested pups are treated like seedlings and planted into a peat and perlite medium, one part peat and two parts perlite. These go directly into tubes due to the volume we do them in. The pups are placed in a shadehouse that has white shadecloth. This gives 30% shade and the plants are watered four times a day (in Queensland, Ed.). The mix is well drained ensuring that the mix is moist but not waterlogged. The pups are then liquid fed with a Seasol mixture on a weekly basis. The pups quickly begin to show signs of growth and within 3-4 months are starting to produce leaves more than a centimeter wide. At this stage they need to be potted on.
Alcantareas are terrestrial bromeliads and produce extensive root systems. I have found that if the young plants are not potted on at this stage they become very difficult to remove from the tubes as the roots tend to attach themselves to the inside of the tubes. We use a standard composted bark/sand potting medium for the alcantareas. We also use high rates of controlled release fertilizer, as Alcantareas are gross feeders. Potting on into larger containers, through trial and error, has taught us to pot the plants high. This exposes the basal tissue of the young plant. If the young plants are very wobbly they can be held in the correct position by small satay sticks or something similar. By planting the plants high it seems to stimulate more adventitious pup production. A small plant in a 140 mm pot can, on average, produce 4-6 pups before it gets to 150 mm tall. A. imperialis tends to produce most pups between 100-200 mm height. In this way pups take less than a year to produce their own pups, and in a short space of time numbers can grow exponentially to the point that I now have more plants than I think I can successfully market.
Other species that we have been able to produce by this method include Alcantarea glazouiana, A. geniculata, A. sp. edmundoi?, A. sp. extensa?, A. sp. brasiliana? and A. vinicolor. I have also had good success with Werauhia sanguinolenta ‘Rubra’ and Vriesea glutinosa.
SOME BROMELIAD TIPS:
By Bob Reilly (Extracted from Bromeliaceae, J. BSQ, March/April 2008)
• Over time, the writing on plant labels can fade. Many labels that have had the writing on them “bleached out” can be read if held at an angle in bright sunlight.
• If you would like to grow a plant that is bigger than the parent, then leave the pup on as long as possible. Cut away the leaves of the mother plant to give the pup plenty of light and minimize the risk of “elongation” or “malformation” in the pup’s appearance. Tilting the parent plant on its side so that the pup is vertical may also help.
SEAWEED EXTRACTS:
A commentary by Stephen Flood (B.App.Sc.[hort])MAIH
(Reprinted from Bromelcairns, newsletter of Cairns Bromeliad Society Inc., 2010 #3)
A number of products exist that contain extracts of seaweed. These include Seasol, Natrakelp and Maxicrop. The first thing growers need to understand about these products is that they are not fertilizers and are in no way a substitute for balanced nutrition based on a mix of macro and trace elements best suited for the particular plant being cultivated. The naturally occurring levels of the mineral elements in seaweed products are too low to make a significant difference to the nutrient regime of any plant. There are, however, seaweed products available that have mineral elements added which give these products the status of a fertilizer.
Seaweed extracts are useful and powerful tonics when correctly used to assist with the cultivation of high quality plants. Seaweed or kelp is the richest natural source of a plant growth regulator or hormone called cytokinin and this hormone exists in a concentrated form in the seaweed extracts. All plants produce cytokinin in the root tips and translocate the cytokinin in the sap flow to all parts of the plant where it is involved with many of the essential functions which promote plant health and vigour. Cytokinin is involved in many internal plant functions, including:
• Cell division: For plants to remain in active growth which is a result of continued cell division a minimum level of cytokinin is required. The speed at which wounded plant tissue heals is directly related to levels of cytokinin.
• Mobilization of mineral nutrients. Plants with high levels of cytokinin are able to use nutrients more efficiently, are less likely to develop deficiencies and, hence, need less fertiliser.
• Floral development is to an extent controlled by this hormone and plants with a high level usually produce larger and longer lasting flowers.
• Seed germination and seedling growth is strongly influenced by cytokinin.
When plants enter a state of stress—which is usually caused by suboptimal growing conditions—the production of root tips is compromised and the subsequent level of cytokinin in the plant tissues is reduced. Plant stress can be caused by many factors, such as too hot or cold, too wet or dry, too much or insufficient nutrients, too much or inadequate light, etc. Artificially applying cytokinin in the form of seaweed extract will boost the internal levels and assist stressed plants survive and reduce the likelihood that healthy plants will enter a state of stress. Appropriately diluted seaweed extracts can be applied to the growing medium and/or foliage. However, avoid applying to a dry medium.
HANDY HINT:
(By Alice Williams—reprinted from Bromeliad Newsletter, Feb 2011 Vol. 29 No. 2)
With the extreme weather we are experiencing at the moment be very careful with your watering. Do not directly water plants in the heat of the day: water either very early morning or after sunset. But do keep up the humidity as much a possible. Ways of increasing humidity include watering the ground under benches; placing pots over trays of water (but do not stand directly in water); place on materials such as thick wads of newspaper or old carpet, etc. which retain water. If in a glass or shade house old sheeting may be hung and sprayed regularly with water.
A LONG JOURNEY FOR TILLANDSIA CYANEA
By Ken Marks, BSI Webmaster [Reprinted from JBS 54(4) 2004]
I’ve spent a good deal of my fleeting spare time lately working towards a long term goal of converting all of the old BSI Journals to HTML and adding them to the Members-Only section of the BSI website.
Occasionally, while reading through these old articles, I come across a real gem of a story. Many times they are humorous in their own right—other times it is the half-century of time that has passed since their writing that brings a new perspective to the article. This article recounts the long journey that Tillandsia cyanea has made from a time when it actually took a “long journey” to obtain one, to today when it is readily available from a number of nurseries, garden shops, and even mega-retailers.
I think some of the commercial success of Tillandsia cyanea might be attributed to the fact that it is one of the very few bromeliads that I know of that has a common name which is very fitting indeed: Pink Quill. Any plant lover who has seen this species with its fuchsia paddle rimmed by oversized, fragrant blue flowers sequentially opening along its margin surely has found a place for it in their collection.
Along with the old standby Aechmea fasciata and an ever-increasing number of stunning “user friendly” guzmania and vriesea hybrids that turn up in various garden centres, it doesn’t take long to spot the hot pink paddles that draw shoppers to these plants as surely as they have drawn plant collectors in the past (and pollinators before that).
While this species may now be snapped up at your local mega-mart in brightly coloured 4” pots for the not-so-princely sum of $2.98, there are even more choices today for the avid collector of this species. A number of interesting botanical forms of this species are now floating around in cultivation. There is one botanical variety called Tillandsia cyanea var. tricolor which has white streaks in the centres of the blue petals. There are also cultivars with pink and even white petals. There is also a very nice variegated form that makes this plant a stunning beauty even when not in bloom. One of the more unusual forms to show up recently has gone by the name “3D” in the trade. The normally flat oval paddle of pink bracts have gone three-dimensional in this interesting mutant. This mutation (or sport) has resulted in a three-faced paddle with three rows of the same fragrant blue flowers running up each edge.
With all these varieties so easily available today it is interesting to read of the trials and tribulations that were required to obtain this species in the 1950s. Here is an excerpt from an article entitled “Hunting Tillandsia cyanea” by Clarence Kl. Horich which appeared in the BSI Journal (then called the Bulletin) in the Jan-Feb issue from 1956 [V6(1)]:
“Unlike all other bromeliads, Tillandsia cyanea cannot just be “picked”. It requires a real back-country expedition to be located and carried back into what South Americans call civilization. A certain “highway” runs close to the place and this is why I asked my friend to call his driver and use his Packard for transportation. The tire burst three times on the way north to the boundary of the province of Guayas [Ecuador]. Actually there is no road, but a spider web of desert tracks with potholes of three feet depth which made us lose our direction several times as each singular driver to tackle this region crosses the country on pure instinct. There are no bridges, but several rivers in the centre of one of which we got thoroughly stuck with the motor completely drowned at 4 am. By 6 am we had pushed the car out while standing in the muddy water to the height of our hips. A day passed and we were ready to leave again. An hour later we rolled over into a cactus studded ditch. The driver was getting nervous by now—but it did not save him from running the car into a sand dune next!
By the time we hit Manabi the lower middle section of the car was thoroughly ground off, as the tire tracks of the inter-provincial trucks to pass through this country are way too deep for a passenger car. Then there was genuine “blowout” and before we knew what had happened the steering wheel spun around like mad. It had broken from its connection.
This did it! There was no other car or truck for twenty-four hours which we spent eating green bananas, wild papayas and killing mosquitoes. Neither houses nor villages are near, instead the forests are full of huge Bushmaster snakes, three-inch spiders, hoards of ants, butterflies and humming birds. Night fell and with it came the spine-curdling noise of the howler monkeys. The morning showed fresh jaguar tracks only thirty feet distant from the car.
There was nothing we could do but grab machete, pistol and walk several hours into the jungle which is rather dense here and there with open, park-like stretches in between. Housing the trees here are Catasetum, Cattleya maxima orchids and the stunning Tillandsia cyanea which grows locally by the hundreds. We returned with a good thousand plants, although the car still lies broken down on some odd track in northern Guayas.”
This story gives you some idea of the difficulties in obtaining bromeliads and it may justify a good price. Take my word that it is not exaggerated.
While I certainly do not encourage the harvesting of thousands of bromeliads from the wild, it is true early plant hunters risked life and limb at every turn. An interesting thought to keep in mind next time you see a pretty pot of Tillandsia cyanea on your bromeliad society’s raffle table or sitting alongside the assorted foliage plants in your local garden centre.
| NEW OPEN GARDEN SCHEME: (Extract from an email sent by Andrew Mowat, Managing Director – My Open Garden Pty Ltd) “Like many people, you would have been greatly disappointed at the recent announcement that the Open Gardens Australia organisation will close its doors in June this year…..For visitors, these open gardens can be a wonderful source of inspiration and discovery. Of course these events were also important fund raisers to support the garden, local communities and for charity. We couldn’t sit by and see this important connection between gardeners disappear. That’s why we decided to launch My Open Garden, a new online service that acts as a “one-stop-shop” for garden owners and visitors across Australia. It’s a free service to visitors and we are publishing as much information as we can about all the Open Gardens and other gardening events. Now community groups, special interest groups and garden clubs have a place to promote their event and, importantly, everyone can get free and easy access to the information. …and that’s why I am sending this email to you so you can let your members know about this new website: www.myopengarden.com.au. You’ll find more details about this new scheme and be able to see some of the gardens we are working to present on the site. For [answers to] any further questions contact me direct at andrew@myopengarden.com.au or on 0419 228 434.” |
49 Rutleys Road WYEE, 2259 Saturday/Sunday, March 21 - 22, 2015 9 am – 4 pm [Bring a box for purchases] Phone: (02) 4359 3356/0418 471 754 Email: bromeliadsaust@myaccess.com.au Free light refreshments provided Please note: No EFTPOS or Card Facilities |